A simple manual for using the online editor for creating photo calendars
1. Select one of the calendar types in the "Calendar" tab

2. Left-click on the format and click "Design Selection"

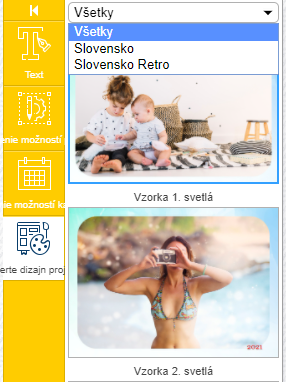
3. The left part shows the themes, sorted by categories. In the right part you will find previews of the themes covers.

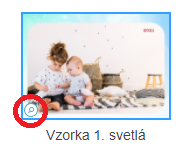
To preview the template before selecting a design, left-click in the lower left of the template image
You can see all the pages of the selected template in a new browser window. Then close the window.

4. Left-click on the design and click "Create"
5. In a new browser window, you can upload photos either from your computer or from a social network.

The progress of the uploading is displayed on the screen

Wait for all photos to be uploaded to the server and press "Add photos to photoset".

6. Wait for all photos to be uploaded to the editor! You will see the progress of the uploading below.
In case of making changes before its completion, the uploading will be interrupted!!!

When the photo upload is completed successfully, the information about it will appear in the upper right corner. We recommend that you log in to your account or register so that you can save the product and not lose work results if you disconnect from the Internet accidently.

Now everything is ready to create a calendar. The default editor mode is "5 clicks". In this easiest mode you can edit photos...

7, You have two ways to add photos to your product: Click the highlighted button to automatically place the photos or manually move the photos to the photocontainer.

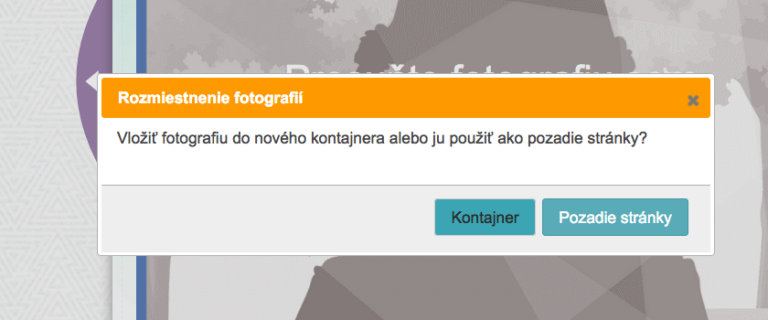
8. Môžete pridať fotografiu na stránku nielen tak, že ju presuniete do fotokontajnera, ale aj kamkoľvek na stránku mimo existujúcich fotokontajnerov. V takom prípade sa zobrazí výzva na pridanie nového fotokontajnera alebo na použitie fotografie ako pozadia
9. Odporúčame produkt uložiť. Ak budete pokračovať s úpravou každej fotografie, kliknutím na označené tlačidlo zapnete automatické ukladanie. To znamená, že váš projekt sa bude periodicky ukladať.
10. In "5 clicks" mode you can add short or long texts. Hold down the left mouse button and drag the element to the selected location on the page

11. You can change the size of the calendar.
ATTENTION: for calendars CLASSIC works with restrictions

12. You can change the calendar settings (for PREMIUM and Pocket only) - add your own dates, select public holidays by country, select the language of the calendar, the year, the first day of the week and set the design elements


14. You can change the template of the calendar.
14. "Creative Mode" offers more options

15. In Creative mode, you can move, resize, delete or edit the photo container:
- change layer,
- set transparency
- round corners
- add shadow
- remove frame
You can add new photocontainer. Hold down the left mouse button and drag the element to the selected location on the page

16. In "Creative" mode, to change the background, select "Backgrounds" on the "Artefacts" tab and double-click to highlight the desired background. In the window that will open, select whether you want to apply the background to the current page or to all calendar pages

17. Pressing the highlighted button CHECK the photo calendar directly in the online editor using the preview. You will receive the photo calendar exactly as you see it in the preview.
18. After pressing the "Buy" button at the top right, you may receive a low-resolution warning of part of the photos. The editor calculates whether the photo has the necessary number of pixels for the selected size, and if it is literally missing only a few, it will warn.
You can view these photos or ignore the warning.
You can view these photos or ignore the warning.

19. Click the "Complete Order" button below
20. Ak ste neuviedli telefónne číslo predtým, napíšte ho do povinného polia.
21. Select the subscription method - "Postage coupon" or "Directly at the office". If you select postage, the editor will ask you to fill in the form with your delivery address.
22. Enter the coupon number and password in the note and press "Continue"
23. Select the payment method "TrustPay" or "Paid by coupon". Follow the instructions and you will then see summary information about your order on the screen. Click "Complete order"
24. If everything went well, you will see the information "Payment checking". If you have allowed us to send e-mails with information about your new orders in your personal account, you will then receive a confirmation e-mail. ATTENTION - also check the "SPAM" folder and if you find an e-mail there, mark that it is not spam, so that you can receive information about the status of your order.
25. Ak v priebehu 24 hodín nemáte žiadne maily, zavolajte na mobilné číslo 0 949 215 536